Aloe vera is the only succulent most people own that they expect to work for them. You don’t harvest your Echeveria for burns, and you don’t squeeze your Haworthia into a smoothie. But aloe gets treated like a first-aid kit with roots, and that expectation changes how people care for it. The myth that aloe is “unkillable” has led to more dead aloes than any pest or disease ever could. The reality is more useful: aloe vera is forgiving, but it responds poorly to the two things beginners do most—watering on a schedule and keeping it in a dark corner because “it’s a desert plant.”
Let’s separate what’s true from what’s merely repeated.
Myth #1: Aloe Vera Needs Less Water Than Any Other Succulent
The rumor has a kernel of truth: aloe tolerates drought better than it tolerates sitting in wet soil. But “tolerates drought” is not the same as “prefers it.” In its native habitat, aloe vera grows in rocky, well-draining slopes that receive occasional heavy rain followed by long dry spells. The plant’s roots are shallow and horizontal, designed to soak up a sudden downpour and then dry out fast.
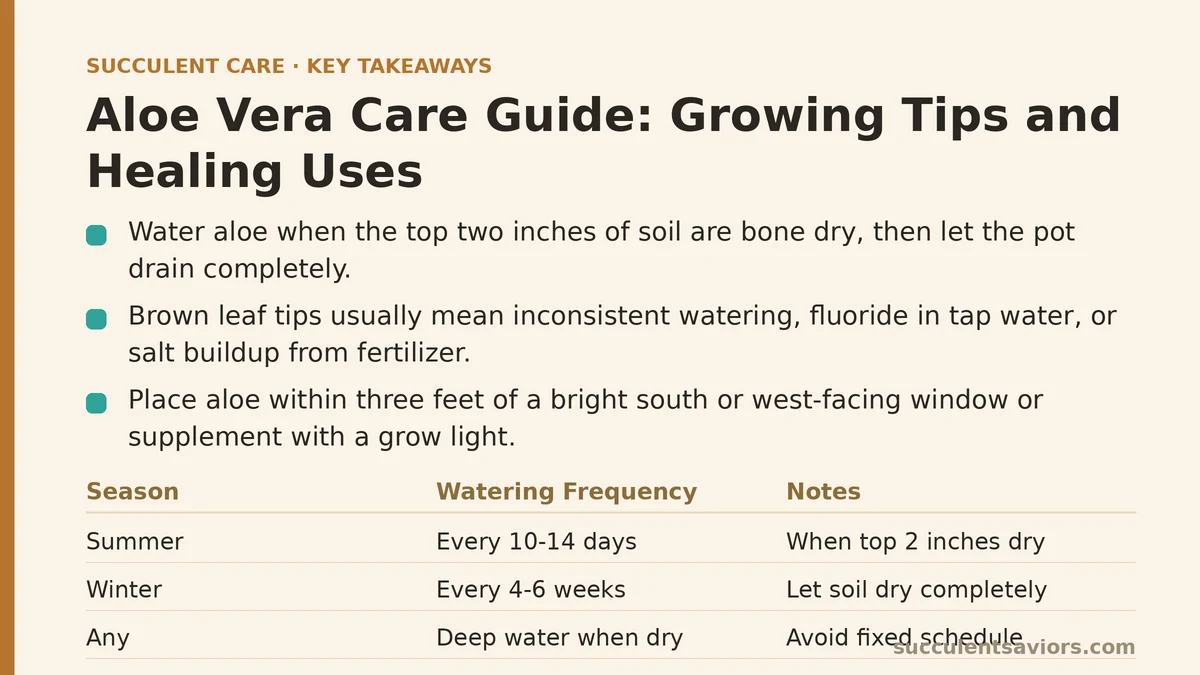
The practical translation: water thoroughly when the top two inches of soil are bone dry, then let the pot drain completely. In summer, that might mean every 10–14 days. In winter, it could stretch to every 4–6 weeks. A fixed schedule fails because your home’s humidity, pot size, and light levels change the dry-down time dramatically. A plastic pot holds moisture far longer than an unglazed terracotta pot. A south-facing window dries soil faster than a shelf across the room.
The failure mode people hit is watering “just a little” every week out of fear of killing it. That keeps the deepest soil perpetually damp, which is precisely what rots aloe roots. Water deeply when the soil is dry, or don’t water at all.
Myth #2: Brown Leaf Tips Mean It Needs More Water
You see a brown, crispy tip on an otherwise healthy green leaf, and your instinct says thirst. In most cases, the opposite is true. Brown tips on aloe are usually a sign of inconsistent watering—periods of extreme dryness followed by a sudden soak. The leaf tissue at the tip is the oldest and most vulnerable; it dries out and dies when the plant goes through stress, and that damage doesn’t reverse when you finally water.
Other culprits include fluoride in tap water, which aloe is notably sensitive to, and salt buildup from fertilizer. If your leaves are browning at the tips but the lower leaves are plump and firm, switch to filtered or rainwater for a few waterings. If you’ve been fertilizing more than twice a year, stop entirely. Aloe vera in fresh potting soil needs no fertilizer for the first year.
The one time brown tips mean a real problem is when they’re accompanied by soft, translucent patches near the base. That combination points to overwatering and root stress, and the fix is to unpot, inspect, and repot in dry, gritty soil.
The Less Obvious Threat: Too Little Light
Aloe is often sold as a “low-light houseplant,” and that’s a lie. It survives in low light for a few months, but survival isn’t thriving. When light levels drop, aloe stops photosynthesizing efficiently. The leaves stretch thin, lose their deep green color, and the plant’s internal gel production drops. A light-starved aloe looks like a stretched, pale version of itself that never quite recovers.
The fix is straightforward: put aloe within three feet of a bright south or west-facing window, or supplement with a grow light for 10–12 hours a day. The plant wants bright, indirect light—direct sun through a hot window for more than four hours can scorch the leaves, but a sheer curtain or a few feet of distance solves that problem. You’ll know you’ve found the right spot when the leaves take on a rich, green-tinted color and the edges show a faint blush of pink or orange under stress-free conditions.
One practical test: if your aloe hasn’t produced a new leaf in three months, light is the bottleneck. Move it brighter and wait two more months before changing anything else.
When Your Aloe Is Dying: The Root Rot Tell
Aloe root rot moves slowly, which makes it cruel. The plant looks fine for weeks—maybe a little pale, maybe the lower leaves soften slightly—while the roots turn to mush underground. By the time the leaves yellow and droop, the root system is mostly gone.
The sensory warning signs you can check without unpotting: a slight sour or musty smell from the soil surface, tiny fungus gnats hovering around the pot, and soil that stays damp for more than two weeks after watering. If you see any of those, unpot the plant immediately. Healthy aloe roots are thick, white-orange, and firm. Rotted roots are dark, stringy, and pull apart easily.
Trim away every affected root, remove any leaves that have turned translucent or mushy at the base, and let the plant sit bare-root on a dry counter for 3–5 days until the wound calluses over. Repot into a mix of 2 parts coarse sand or perlite to 1 part potting soil, in a pot with drainage holes—terracotta is ideal for its breathability. Water nothing for at least ten days after repotting, then begin the soak-and-dry cycle from the top of this guide.
Harvesting the Gel the Right Way
Most people cut a leaf from the middle of the plant, squeeze it like a toothpaste tube, and get a runny, yellow-tinged mess that burns their skin. Two mistakes compound: wrong leaf, wrong preparation.
Choose the older, outermost leaves—the ones that are thick, plump, and at least 6 inches long. These contain the most mature gel. Cut them as close to the base as possible with a clean knife. Stand the leaf upright in a glass for 10–15 minutes. The yellow latex sap that drips out is a laxative and skin irritant; letting it drain prevents it from contaminating your gel.
Lay the leaf flat, slice off the spiny edges, then carefully slice away the green rind from the top to expose the clear gel inside. Scoop the gel out with a spoon. It keeps for one week in the fridge in an airtight container, or you can freeze it in ice cube trays for up to three months. Fresh gel directly from the leaf is best for minor burns, small scrapes, and as a soothing face mask—but always test on a small patch of skin first, because a small percentage of people are allergic to aloe.
Choosing Between the Three Common Aloe Species
Most plants labeled “aloe vera” in big-box stores are Aloe barbadensis miller, which is the medicinal variety you want for home remedies. But growers also sell Aloe arborescens (tree aloe) and Aloe aristata (lace aloe), and the differences matter.
Aloe barbadensis has thick, upright, grey-green leaves with pale spots—this is your medicine cabinet plant. Aloe arborescens has thinner, curved leaves arranged in a rosette, and it grows into a small tree over a decade; its gel is also usable but less concentrated. Aloe aristata is small and spiky, more ornamental than medicinal; it produces offsets freely and makes a fine miniature, but you won’t harvest meaningful gel from it.
If you want an aloe for both beauty and burns, grow barbadensis. If you want a dramatic specimen that still offers gel, arborescens. If you want a low-maintenance desk plant that looks interesting, aristata.
Practical Propagation for a Continuous Supply
Aloe pups—the small offshoots that cluster around the mother plant’s base—are the easiest way to get more plants. When a pup is at least a third the size of the mother and has several roots of its own, gently remove the whole plant from its pot, brush away soil, and twist the pup away from the parent. Pot it in its own small container with fresh gritty mix, and water after four days, not immediately. Pups without roots will still root if you let them callus for a week and plant them in barely-moist soil, but the success rate drops.
The best time to divide is spring or early summer, when the plant is actively growing. A single well-cared-for aloe can produce 3–5 pups per year, which means you’ll never run out of gel—and you’ll have gifts for every plant-loving friend you own.
Quick Reference: Myth vs. Reality
| Common Claim | Reality | What To Do Instead |
|---|---|---|
| “Water aloe once a week” | Causes root rot in most homes | Check soil dryness two inches down; water only when bone dry |
| “Brown tips mean thirst” | Usually overwatering or fluoride sensitivity | Switch to filtered water; stop fertilizing |
| “Aloe thrives in low light” | Survives temporarily, then stretches and pales | Place near a south/west window or add a grow light |
| “Any leaf works for gel” | Old, outer leaves give the best gel | Harvest outer leaves at least 6 inches long; drain latex first |
| “Aloe is unkillable” | It’s forgiving, but overwatering kills it consistently | Match care to seasonal light and pot conditions |
The plant that people call a weed is the same one they panic over when it yellows. Aloe vera is neither immortal nor fragile—it simply has rules. Give it gritty soil, bright indirect light, and a soak-and-dry rhythm that respects the season, and it will reward you with decades of thick, usable leaves. The gel in your pot is always fresher than anything in a bottle, and the act of cutting a leaf from a plant you grew yourself changes how you treat minor burns forever.
Which aloe myth have you been following—the fixed watering schedule, or the low-light promise—and what’s the first change you’ll make this week?
Related guides: Agave Care Guide: Types and Care Tips for a Thriving Collection, Aeonium Care Guide: Troubleshooting Common Problems, and Graptopetalum Care Guide: The Ghost Plant’s Top 5 Needs, Ranked.