Most beginners believe repotting a succulent is a high-stakes surgery—one wrong move and the plant dies. That fear keeps too many healthy plants stuck in tiny nursery pots with roots circling the bottom like a trapped animal. Here’s the correction: repotting is one of the most forgiving things you can do for a succulent, provided you follow a few simple rules about timing, soil, and water. In fact, most succulents want to be repotted. They outgrow their containers faster than you’d expect, and a cramped root system leads to slow growth, pale leaves, and a plant that constantly looks thirsty even when you water on schedule.
This guide walks you through the entire process in a checklist format—what to look for, what to do at each stage, and what to fix if something goes wrong. No fluff, no unnecessary steps, just the order of operations that works.
Step 1: Check the Symptoms That Say “Repot Me Now”
Your succulent won’t send you an email asking for a bigger home, but it will show clear signals. Walk through this checklist before you decide to repot:
| Symptom | What It Means | When to Act |
|---|---|---|
| Roots poking out of drainage holes | Root-bound; the pot is too small | Immediate repot, regardless of season |
| Soil dries out within 1–2 days | Roots have filled the pot, no soil left to hold moisture | Immediate repot |
| Plant lifts easily out of the pot when gently tugged | Root ball is dense and compacted | Repot within a week |
| Growth has stalled for three or more months | Roots are suffocating or circling | Repot at the start of the next growing season |
| Discolored or mushy lower leaves | Possible root rot—repot is urgent | Repot immediately into dry, fresh soil |
The beginner trap: Waiting for the perfect season. If you see roots poking out of the drainage hole, don’t wait for spring. A root-bound plant in a tiny pot will suffer more from being left alone than from being repotted at a slightly less ideal time. The exception is if the soil is frozen solid—then you’ll need to wait a few weeks.
Step 2: Choose the Right Pot (And Avoid the #1 Mistake)
The single most common beginner error is choosing a pot that’s too big. Leave some room for it to grow!" you think, and then the succulent sits in a huge container where the soil stays damp for weeks, and the roots rot before they ever reach the edges.
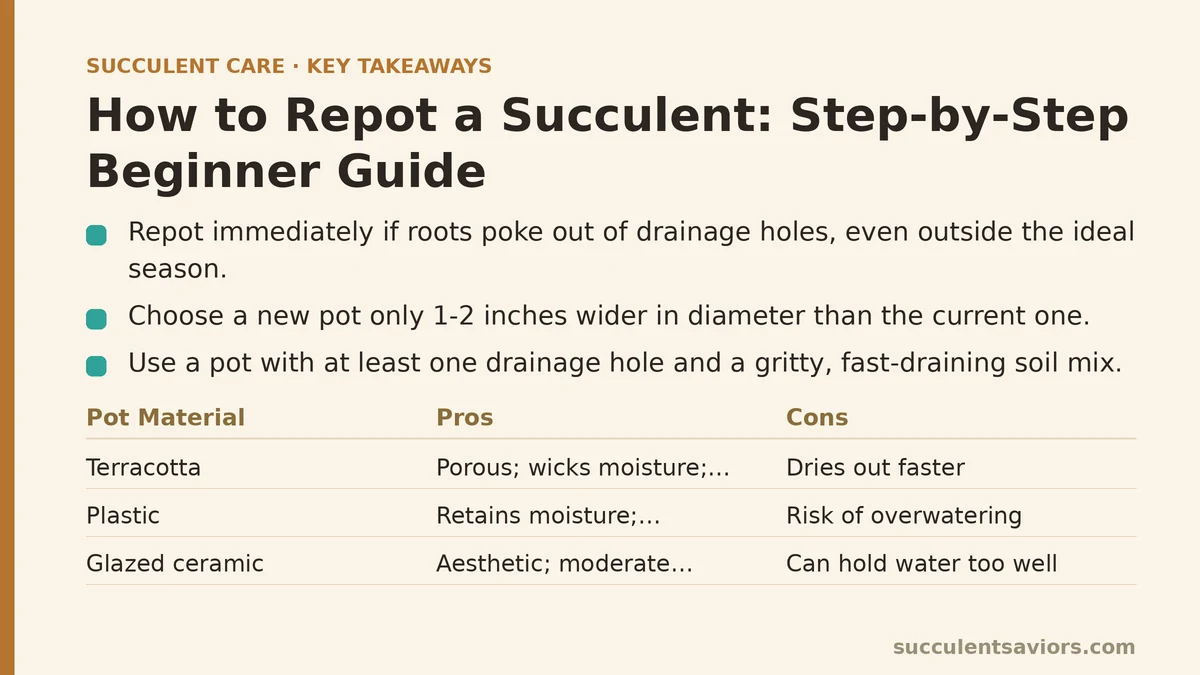
Correct pot size: The new pot should be only 1–2 inches (2.5–5 cm) wider in diameter than the current pot. Your succulent wants snug, not spacious. A tight fit keeps the soil drying evenly and prevents that dreaded soggy middle.
Material matters more than you think:
| Pot Material | Pros | Cons |
|---|---|---|
| Terracotta / unglazed clay | Porous; wicks moisture away; ideal for beginners | Dries out faster; needs more frequent watering |
| Plastic | Retains moisture; lightweight; cheap | Risk of overwatering if you’re not careful |
| Glazed ceramic | Aesthetic; moderate moisture retention | Can hold water too well for succulents |
For a beginner, terracotta is the forgiving choice. It dries out faster, which means you get a built-in buffer against overwatering. If your succulent is already prone to staying damp, switch to terracotta even if you keep the same pot size.
Non-negotiable requirement: The pot must have at least one drainage hole. No exceptions. A pot without drainage is a death sentence for a succulent—water accumulates at the bottom, roots sit in it, rot follows.
Step 3: Prepare Your Supplies (Don’t Skip the Soil Mix)
You can’t repot properly with garden soil. Succulents need a gritty, fast-draining mix that mimics their native rocky habitats. Here’s what to have ready before you start:
- Fresh succulent soil mix (store-bought or DIY)
- Drainage material (perlite, pumice, or coarse sand—not play sand)
- Sterile scissors or pruning shears
- A chopstick or skewer (for settling soil)
- A tray or newspaper (to contain the mess)
- Optional but helpful: Rooting hormone powder, a small brush for cleaning roots
DIY soil recipe if you want to mix your own: 2 parts succulent potting mix + 1 part perlite + 1 part coarse sand. The goal is a mix where water runs through quickly, not one that holds moisture like a sponge.
Smell check: Before you reuse any old soil, give it a sniff. Healthy soil smells earthy, like fresh rain. Rotten soil smells musty, sour, or like a damp basement. If it smells off, throw it out and start fresh.
Step 4: The Repotting Process Itself (Step-by-Step)
Now we get to the actual work. Follow each step in order, and you’ll avoid the messy middle-ground mistakes that leave succulents damaged.
1. Water your succulent 2–3 days before repotting. This is counterintuitive but crucial. A hydrated plant tolerates root disturbance far better than a dry one. The soil should be slightly damp, not soaked, when you start.
2. Gently loosen the succulent from its old pot. Tilt the pot sideways, support the plant base with one hand, and gently squeeze the pot’s sides to release the root ball. If it won’t budge, slide a butter knife around the inner edge of the pot to loosen it. Do not yank the plant by its leaves—succulent leaves can pop off easily, and that’s a setback you don’t want.
3. Examine the root system. This is the moment of truth. Healthy roots are white, firm, and evenly distributed. Rotted roots are dark, mushy, or crumbly. If you see rot, this is where you switch to troubleshooting mode (see Step 6 below).
4. Trim any dead or damaged roots. With sterile scissors, snip away anything that looks brown, black, or shriveled. Also trim away any roots that have grown in a tight circle around the bottom of the root ball—those circles will strangle the plant over time.
5. Add fresh soil to the new pot. Fill the bottom of the pot with a layer of your gritty mix. Aim for enough soil that the top of the root ball will sit about 1 inch (2.5 cm) below the rim of the pot. This leaves room for watering without overflow.
6. Place the succulent in the center. Hold the plant at the correct height, with its base level with the pot rim. Use your other hand to gently backfill soil around the roots. Tamp the soil down lightly with a chopstick or the handle of your scissors to remove air pockets. Don’t pack it down hard—succulent roots like loose, airy soil.
7. Give the pot a gentle tap on the table. This settles the soil naturally around the roots. Then top off with more soil if needed.
8. Wait before you water. This is where most beginners fail. Your succulent needs 5–7 days to heal any root damage before it can absorb water. Watering immediately invites rot into fresh wounds. Place the newly potted plant in bright, indirect light and leave it alone.
Step 5: Aftercare—What to Do for the First Few Weeks
The care you give in the first month after repotting shapes whether your succulent thrives or sulks.
The first watering: After 5–7 days, water thoroughly until water runs out the drainage holes. This “first soak” signals to the roots that it’s safe to grow into the fresh soil. Then go back to your normal soak-and-dry routine.
Light during recovery: Keep the plant in bright, indirect light for the first week. Direct sun on a freshly repotted plant can cause leaf burn, especially if the plant was previously in lower light. After a week, gradually reintroduce it to its regular sunny spot.
Don’t fertilize for 4–6 weeks. Fresh potting soil contains enough nutrients. Adding fertilizer now is like giving a patient a steak dinner right after surgery—it’s more stress than help.
Watch for settling: After the first week, the soil may have settled a bit. You might need to add a thin layer of fresh mix around the base to cover any exposed upper roots. Don’t bury the stem deep—succulents like to sit at the soil line, not below it.
Step 6: Troubleshooting—What to Do When Things Go Wrong
Repotting mistakes are common, but they’re rarely fatal if you catch them early. Here’s what to do when you see trouble:
| Problem | Symptom | Fix |
|---|---|---|
| Shriveled leaves within 3 days | Plant wasn’t watered enough before repotting, or roots were damaged badly | Mist the soil lightly (don’t soak) and move to brighter light; monitor daily |
| Yellow, translucent leaves | Watered too soon after repotting; root rot starting | Unpot immediately, trim all rotted tissue, let callus for 24 hours, repot in bone-dry soil, wait 7 days before watering |
| Leaves falling off easily | Physical stress from rough handling; or plant was already stressed | Collect the fallen leaves, set them aside to propagate; the main plant will recover if lightly watered after a week |
| Plant tilts or wobbles in the pot | Soil didn’t settle properly around roots | Gently lift the root ball and re-tamp the soil; add a thin layer of soil to firm it up |
| White, fuzzy mold on soil surface | Soil staying too wet; poor airflow | Scrape off the mold, move to a brighter spot with airflow, and wait longer between waterings |
The most common beginner failure: Repotting into too-wet soil and then watering immediately. If your soil feels damp a week after repotting, you’re overwatering. Succulents want you to forget about them between waterings, not check on them daily.
Step 7: When to Repot Again (The Frequency Myth)
“Repot every year” is a common rule, but it’s incomplete. The real answer is: repot when the plant outgrows its container, not on a calendar. Some slow-growing succulents can live happily in the same pot for 3–4 years. Fast growers like Echeveria and Sedum might need repotting every 12–18 months.
Watch for the root symptoms from Step 1, not the date. Your plant will tell you when it’s ready.
Quick Reference: Repotting Success Checklist
| Phase | Do This | Skip This |
|---|---|---|
| Before repotting | Water 2–3 days prior | Don’t repot a bone-dry plant |
| Pot choice | 1–2 inches wider; drainage holes | Don’t go huge “for growth” |
| Soil | Gritty, fast-draining mix | Don’t use garden soil |
| During repot | Trim dead roots; loosen root ball | Don’t yank by the leaves |
| After repot | Wait 5–7 days to water | Don’t water immediately |
| First month | Bright indirect light; no fertilizer | Don’t move to full sun right away |
| Ongoing | Watch for root symptoms | Don’t repot on a fixed schedule |
Which repotting step makes you most nervous—cutting into the roots, or trusting yourself not to water too soon?
Related guides: Succulent Root Bound Signs: When to Repot (A Step-by-Step Walkthrough), Step-by-Step Guide to Repotting Succulents Without Shock, and Succulent Pest Treatment with Neem Oil: A Step-by-Step Beginner Guide.