Arrangement longevity is the length of time a planted succulent composition holds its intended shape, color, and health before it thins, etiolates, rots, or needs to be rebuilt. Most arrangements fail not because of poor plant care in the months that follow, but because of structural and design decisions made on the day they were planted—container choice, soil volume, plant compatibility, and spacing. A succulent bowl built for a single afternoon of visual impact and a bowl built to last eighteen months can use the exact same plants and look nearly identical on day one. The difference only becomes visible weeks later.
This post walks through a single arrangement from planning to the six-month mark, using its decline—and the redesign that fixed it—to explain which design mistakes matter most and how to avoid them.
The Arrangement That Looked Perfect in June
Picture a round, shallow bowl roughly ten inches across and four inches deep, glazed ceramic with no drainage hole. It was planted in early summer with tight clusters of echeveria, a few tiny haworthia, a couple of sedum sprigs, and a small crassula tucked toward the back. The plants were packed shoulder to shoulder, soil mounded up between them, and a top dressing of white gravel finished it off. It sat on a sunny windowsill, and for about six weeks it was the best-looking planting in the house.
By early August, three problems had developed in parallel. The echeveria in the brightest spot had stretched and opened at the center, losing the tight rosette shape that made it attractive. The crassula at the back had yellowed and dropped leaves, and the soil surface near it smelled faintly sour. And the sedum had grown sideways across the whole bowl, flopping over the echeveria and burying the gravel completely. Nothing had been done “wrong” in terms of routine care—the owner watered sparingly and gave it plenty of light. The failures were baked into the design.
That single bowl is a useful teaching example because each mistake it contained is common and each one has a straightforward fix. The rest of this post breaks down what went wrong, in the order the problems usually become visible.
Mistake 1: A Container With No Drainage and Too Little Depth
The drainage-hole issue gets repeated so often that it starts to sound like a cliché, but the depth problem is discussed far less and is just as damaging. Both are container-design mistakes, not watering mistakes.
What went wrong in the example: With no drainage, the only way to water without risking rot is to give very small amounts, which leaves the lower soil chronically damp and the upper soil too dry—or to water thoroughly and let the excess sit permanently in the bottom inch. In a four-inch-deep bowl, “the bottom inch” is a quarter of the entire soil volume, and it never dries. The crassula, with roots reaching down into that zone, was the first to show stress.
What to choose instead: There are three realistic container paths, and each suits a different situation.
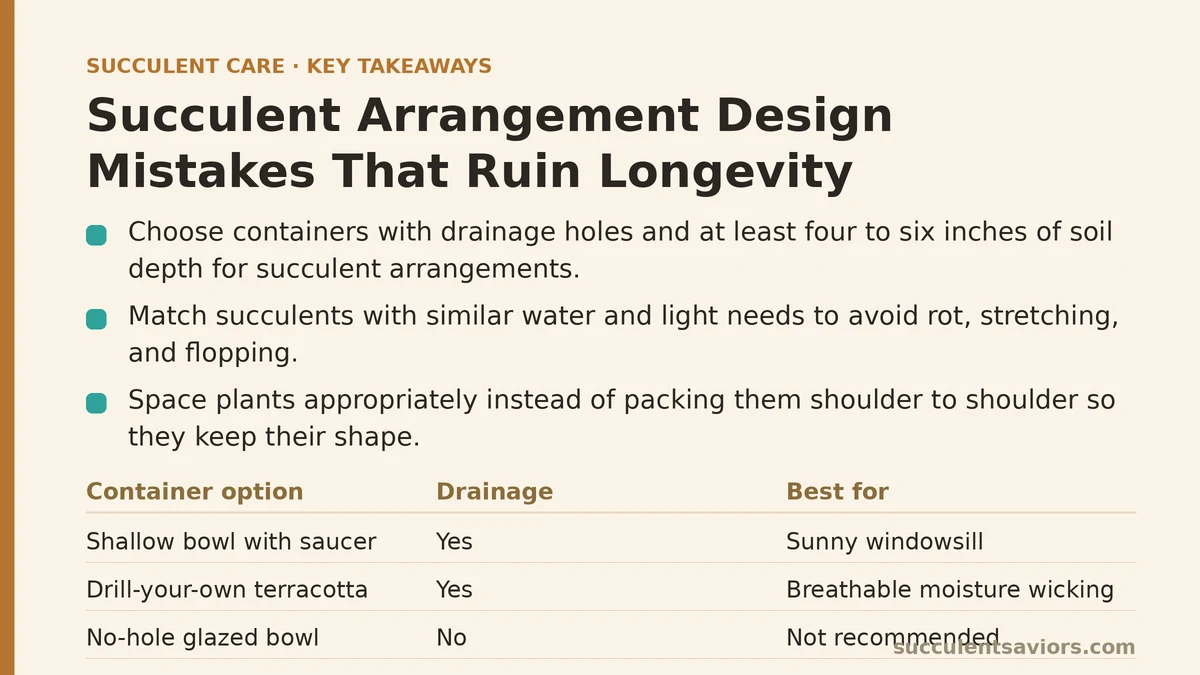
- A shallow bowl with a drainage hole and a saucer. The best default for a sunny windowsill. Water freely, let the bowl drain completely, and empty the saucer after twenty minutes. Soil depth of four to six inches is workable for most rosette succulents.
- A drill-your-own unglazed pot. Unglazed terracotta breathes and wicks moisture, which buys forgiveness in humid rooms. Add a drainage hole with a masonry bit if the pot lacks one—this is a fifteen-minute job and changes the entire moisture profile.
- A truly drainage-free decorative vessel, treated as a short-term planting. Fine for a centerpiece used seasonally, but accept up front that the arrangement is a temporary display, not a long-term home. Use a generous layer of coarse material at the bottom, plant shallow-rooted succulents only, and plan to repot within a few months.
Do not try to have it all three ways. A sealed deep container packed with thirsty plants is the combination most likely to produce the sour smell that signals root rot.
If you are unsure which path fits your space, the table below is a practical starting point.
| Container option | Soil depth | Watering forgiveness | Realistic lifespan | Best suited to |
|---|---|---|---|---|
| Shallow bowl, drainage + saucer | 4–6 in | Moderate | 12–24 months | Sunny windowsills, small rosettes |
| Terracotta pot, unglazed, drainage | 6–8 in | High | 18–36 months | Humid rooms, beginners testing arrangements |
| Decorative sealed vessel | 3–5 in | Low | 2–4 months | Seasonal centerpieces, gifts |
| Trough with multiple plants, drainage | 6–10 in | Moderate | 12–18 months | Mixed-species displays with room to spread |
The last row is worth a note: a wider trough gives each plant its own patch of soil, which reduces competition and makes the whole display easier to manage than a tightly packed bowl.
Mistake 2: Mixing Plants With Incompatible Growth Rates and Water Needs
A succulent arrangement is a small community, and communities fail when members have conflicting needs. The visual problem is that mixing plants looks better than using one species—but visual variety and horticultural compatibility are two separate decisions.
What went wrong in the example: The sedum was a fast, sprawling grower. The echeveria was a slow, upright rosette. Within two months the sedum had outgrown its allotted space and was smothering the echeveria, while also consuming water faster than its slower neighbors. Meanwhile the crassula was a heavier drinker than the rest, which is why it suffered first in the waterlogged bottom zone.
The compatibility check to run before planting:
- Growth rate. Pair fast spreaders with fast spreaders, or give fast growers their own container edge where sprawling looks intentional.
- Water needs. Group the thirsty (crassula, some sedum) separately from the drought-hardy rosettes (echeveria, sempervivum), or accept that one group will always be slightly under- or over-watered.
- Light preference. A single bright windowsill does not suit everything. Haworthia, for instance, is happier with a little shade than echeveria and will scorch if given too much direct sun.
- Eventual size. A plant that looks small in June may be the reason the bowl fails in October. Read the mature size, not the nursery-pot size.
Probe each plant at the soil line with a finger before planting—feel whether the root ball is tight and firm or loose and crumbly. Tight, well-rooted succulents tolerate close planting; loose, recently propagated cuttings do not. That single sensory check tells you more than the plant label.
Mistake 3: Packing Plants Too Tightly and Up to the Rim
A tight packing job looks lush on day one and is often the single fastest route to decline. There are two mechanisms at work, and both are design-level problems.
Airflow: Succulents that touch each other hold moisture between their leaves for far longer than plants with air gaps. That trapped moisture, combined with a sealed container, is a direct path to rot and mealybug infestations. The reference example’s echeveria and sedum were in constant contact, and the leaf undersides never dried completely.
Spacing as a layout decision: A well-designed arrangement leaves deliberate negative space—visible soil or gravel between clusters. That space is not wasted; it is the room the plants will occupy as they grow. An arrangement that starts with every gap filled has nowhere to grow but up and over its neighbors, which guarantees either etiolation or smothering.
The practical rule: Plant as though the arrangement will be photographed from above in six weeks, not today. Leave roughly the width of one mature rosette between plant clusters. It will look sparse for a few weeks, and that is the correct look. Fill the gaps with gravel or decorative stone rather than with more plants.
Mistake 4: Choosing the Wrong Soil and Top Dressing
Soil is a design choice, not an afterthought, because it controls how the container behaves between waterings.
What went wrong: The example bowl was filled with a standard potting mix, which holds water too well for a sealed, shallow container. The white gravel top dressing looks clean, but a fine-grain dressing that sits flush against plant stems traps moisture exactly where crown rot begins.
What to use instead: A gritty, fast-draining succulent mix—roughly two parts mineral material (pumice, perlite, or coarse grit) to one part organic matter. It feels loose and crumbly between the fingers and drains within seconds when you water. For top dressing, choose a coarse material (larger pebbles or pumice) applied shallowly and kept a half-inch clear of each stem so air can reach the base.
Mounded soil is another quiet longevity killer. Soil piled above the rim looks sculptural but dries unevenly and drains poorly. Keep the soil level an inch below the rim so water collects and drains rather than running off the top.
What the Redesign Looked Like
The fix for the failing bowl was not complicated, and it is a useful model for rebuilding any struggling arrangement.
- Unpot everything and triage. Healthy rosettes were lifted out, roots checked, and any mushy or black root tissue trimmed away with clean scissors. The crassula was discarded—its rotting was too advanced.
- Switch containers. The planting moved into a wider, shallower terracotta trough with a drainage hole and a matching saucer, increasing surface area without adding risky depth.
- Repot with better spacing. Each echeveria got roughly one rosette-width of clear soil around it. The haworthia were grouped together on the shadier end. The sedum was given the front edge where trailing over the rim looks deliberate rather than invasive.
- Repot in gritty mix, dress the surface coarsely. Coarse pumice top dressing, kept clear of stems.
- Rebuild gradually. This is the part that feels counterintuitive: the redesigned trough looked half-empty for about a month. New offsets filled the gaps over the following season.
Six months on, the arrangement was holding its shape, the echeveria had regained tight rosette form, and the haworthia were producing new leaves. The lesson is not that the original planting was doomed—it is that every one of its failures traced back to a decision made in the first hour of planting.
Planning Checklist for a Long-Lasting Arrangement
Before you plant, run through these in order. They take ten minutes and cover the mistakes that matter most.
- Container has a drainage hole, or you have accepted a short display lifespan.
- Soil depth is appropriate to the plants (usually 4–6 inches for rosettes).
- Every plant in the mix shares roughly the same water and light needs.
- Growth rates are either matched or given separate zones.
- Spacing leaves room for one mature rosette between clusters.
- Soil is a gritty, fast-draining mix, not standard potting compost.
- Top dressing is coarse and kept clear of plant stems.
- Soil level sits an inch below the rim.
If any box is unchecked, fix it now rather than watching the arrangement decline for two months. The most forgiving succulents will outlast a bad planting for a while, but they will not outlast it indefinitely.
Which of these design mistakes tends to catch you—mixing incompatible plants, or packing them in too tightly—and how long did it take for the problem to show up in your arrangement?
Related guides: How to Plant a Succulent Arrangement That Lasts, Best Soil Mix for Succulents in Containers, and Why Succulents in Arrangements Rot: Causes and Fixes.